Wednesday, July 19, 2006

How To Make a Secret Hollow Soda Can:

For this you will need:

  • Coke cans/soft drink cans/beer cans whatever you can find or want to use (these cans must be unopened)

  • Sharp scalpel or knife

  • Can opener

  • 1 bag of plaster of paris

  • 1 small glass jar with metal screw on lid (small spring valley bottles or those small jam bottles are good)

  • cup or jug

  • glue gun or strong super glue


Ok, now you have your materials, grab your unopened drink can and sharp knife/anything pointy and sharp.
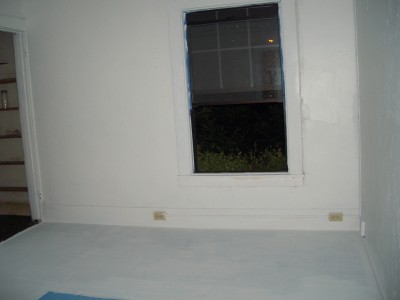
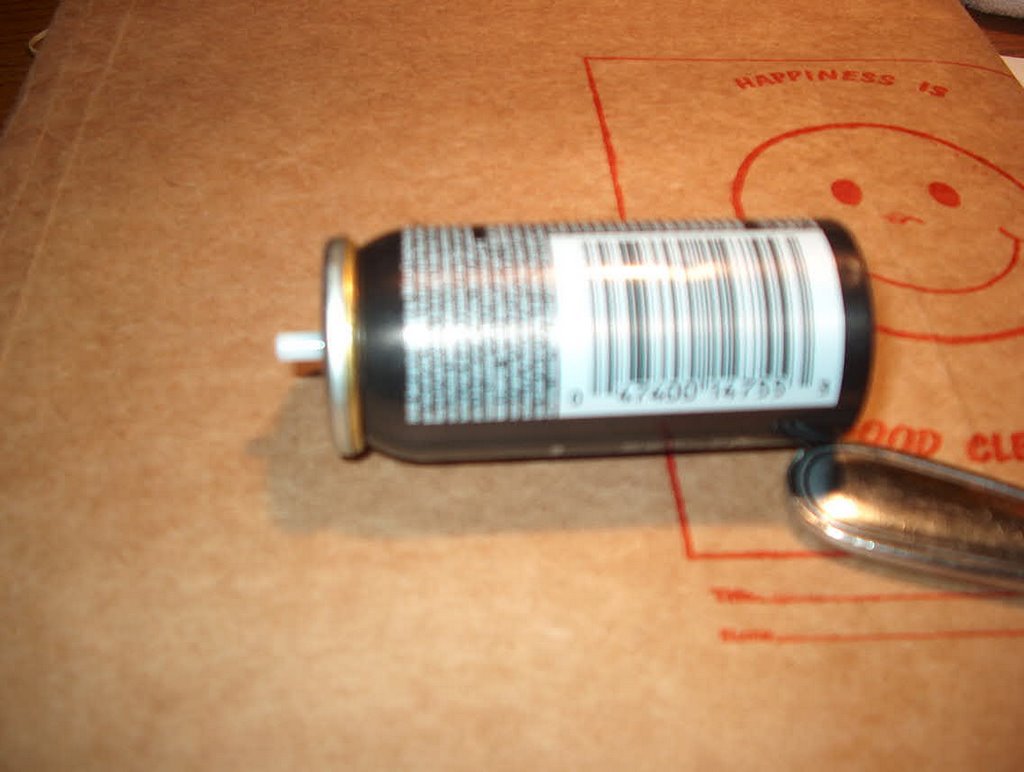
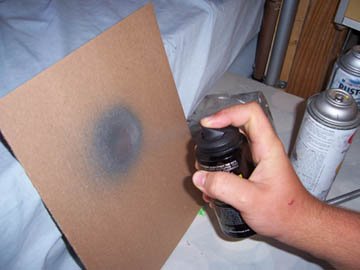
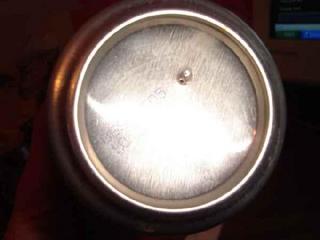
Then on the bottom of the can make a small hole to drain the liquid out of the can (pic 1) into a cup or jug, this can be messy so start off with a small hole and slowly make it bigger. Once the can is empty we get to the tricky bit, I have ended up having to restart after this step.


Now to remove the top of the can. It’s actually not that hard once you know what you doing. Grab the can opener and grip it on the top of the can, making sure that the can opener is cutting the can part and not the top ’lid’ part. Some can openers won't allow you to cut like mine, but most will be able to do it properly.


Once you have cut this lid off, clean it up and wash the can out thoroughly. The lid may contain a few little dags of metal so remove those if necessary. Now, you should be left with an empty can and a lid that fits on the top flush.


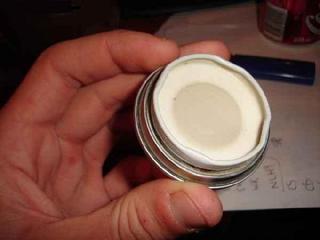
Now, take the glass jar and remove the screwtop lid. Take the top of the can and glue the jar lid to the bottom. Wait until it dries and screw it on the jar to test to see if it strong enough.


Now to fill the can with the plaster. Mix it up in a bowl and you will only need enough to fill the can about half way. Then use a small bit of silicone or glue and patch up the hole we made in the bottom of the can, you don’t want any plaster leaking.


Take the top of the can with the lid glued to it and we screw it onto the jar. we then start to pour our plaster into the can filling it to about halfway. Once at half way, we take the jar and lid and place it in the can. This is to get the jar at the right height so it closes and looks like a normal can. If there is not enough plaster in the can, fill to the desired height and leave the lid on the can until the plaster has dried. We want the plaster to create a base for the jar but also hold it firmly inside the can. The plaster should cover at least half of the jar.


After few hours, check to see if the plaster has dried. If it has, slowly unscrew the lid off the top of the can to test to see if the jar has held. Test screwing the lid on and off a few times just to see if everything is held and that is pretty much it.


You can modify the can and make it a bit more stealthy, and that is to add a water (or any other type of liquid) pack to the bottom of the can and plaster over it. This creates a liquid sound inside the can when it is shaken, so it even sounds real.


Article by RemadE.

Friday, April 21, 2006

How To Make a Sideways Room:

Step 1. Get an empty room.


Step 2. Paint the entire room white — including the floor.


Step 3. Paint a window on the floor, just for fun. Then let the paint dry overnight. (I used electrical tape to make the window frame and bars.)


Step 4. Bring in a couch, nail up a rug on the wall, and hang a table over it (we used monofilament thread from the hardware store).


Step 5. Add a poster and a light switch on the ceiling for effect. (We also threw in a fake power outlet mounted sideways on the far wall, which you can see in the first picture up top. The other outlet in that picture, which looks much too high to reach, damages the effect — I should have painted it white.)


Step 6. Reinstall the curtain rod and tack up the drapes to make them hang sideways. Stick some stuff to the table in a suggestive manner.


Step 7. Nail a trash bin high up in a corner of the room, and arrange some trash around it. "Lean" a broom against the ceiling (again using monofilament thread).


Step 8. Add a bookshelf and fill it with books. Also add an end table and hang a lamp on it.


Step 9. Suspend a ceiling lamp and its cord so it "hangs" sideways out of the opposite wall into the middle of the room. (Unfortunately, we don't have a good picture of this.)

Step 10. And the coup de grĂ¢ce — affix a chair high on the wall (using metal L-brackets). This one change suddenly added a whole new level of vertigo. Standing in the room began to feel like floating overhead.


Step 11. Cackle evilly. Or giggle uncontrollably. Or both.

The whole thing took two days (one day for painting, one day for arranging everything else). Hope you enjoyed this as much as we did. This project really made me want to do crazy art installations for a living.


Original Tutorial by Zestyping.

Wednesday, April 05, 2006

How To Transfer Spray Paint into Another Bottle:


  1. Find the spray paint that you want to use. Also, find the empty can that you want to transfer the paint into.


  2. Pry the cap off of the empty can. Be careful not to damage it. Your empty can should look something like this:


  3. Take the tube out of the inside of a gel pen. Rip off the tip, and blow out all of the ink. Run water through to get any ink that might be left inside out of it. Cut the tube in half, and keep the end that had the tip on it.


  4. Pull the cap off of the spray paint can. Cut it apart to get the tube out of it.


  5. Put this tube into one end of your gel pen tube.

  6. Heat up the other end of the gel pen tube.


  7. Put the heated end onto the tube sticking out of the empty bottle. Use a little bit of force to get it on, you are trying to form the tube to the right size.


  8. Take the gel pen tube off of the empty can to let it cool. Now it should look something like this:


  9. Place the end of the tube with the tube that came off of the spray paint into the spray paint can. Place the end of the tube that you modified over the tube of the empty bottle.

  10. Press in the direction of the empty bottle, opening the bottle.

  11. Press on the spray paint can, so that paint starts to move from the spray paint can into the empty can. Make sure that the spray paint can has its tip horizontal to the tip of the receiving can.

  12. Shake the receiving can often to see how full it is. Fill to desired amount. WARNING: Do not overfill. Doing so will result in paint flying all over the place.


  13. Remove the tube and replace the tip onto the now full bottle.

  14. Voila! Shake the can really well (it doesn't have the ball used in spray paint cans to mix the paint, so it will take longer than usual), and use.


TIPS:
  • Wrap the receiving can in an ice pack to make the filling faster.
  • Cover the receiving can with plastic to minimize mess.
  • If there is not enough pressure in your can, repeat the process, but with the spray paint can vertical to the receiving can. The spray paint can should be upside down (tip facing the ground). This transfers only pressurized gas into the bottle.

Tuesday, March 21, 2006

How To Destroy a CD:

There are a lot of different reasons for wanting to destroy a CD. Maybe it's a crappy band like U2, or a CD that you burned with stuff that you don't want anyone to see on it, either way, you don't want that CD to ever be played again. Here we will outline several methods for doing this, all work equally well, but some are more intense than others. Intensity will be rated using the internationally accepted intensity scale of Vin Diesels (1-5 Vin Diesels: the more Vin Diesels, the more intense).


1) Microwave It: Put the CD in the microwave until it starts to crack and spark and stuff. Watch it for a second, and then turn off the microwave.


Intensity Rating:


2) Shoot It: Get a gun and pump it full of lead. A shotgun, handgun, rifle, or BB gun will work.


Intensity Rating:


3) Break It: Put it in a newspaper or t-shirt and snap it in half. Do it in your bare hands if you are super manly.


Intensity Rating:


4) Put a Warning on It: Okay, so it isn't quite destroyed, but if your warning is good enough, we guarantee that no one will use it. Ours said "Warning: Trying To Use This CD Will Result In Infertility".


Intensity Rating:


5) Scratch It: Scratch it, a lot. Make sure that it is really scratchy. You can even get creative with it (we didn't).


Intensity Rating:


6) Disguise It: This is another one that doesn't really destroy it, we were just in the mood for drawing a mustache on something.


Intensity Rating:


7) Burn It: Incinerate it with your flamethrower.


Intensity Rating: